WARNING : A complete rewrite of this script has been made.
You can find it here : Zabbix and Pure Storage monitoring V2
A few weeks ago, at work, we have started a new POC for one of our infrastructure with a Pure Storage FlashArray.
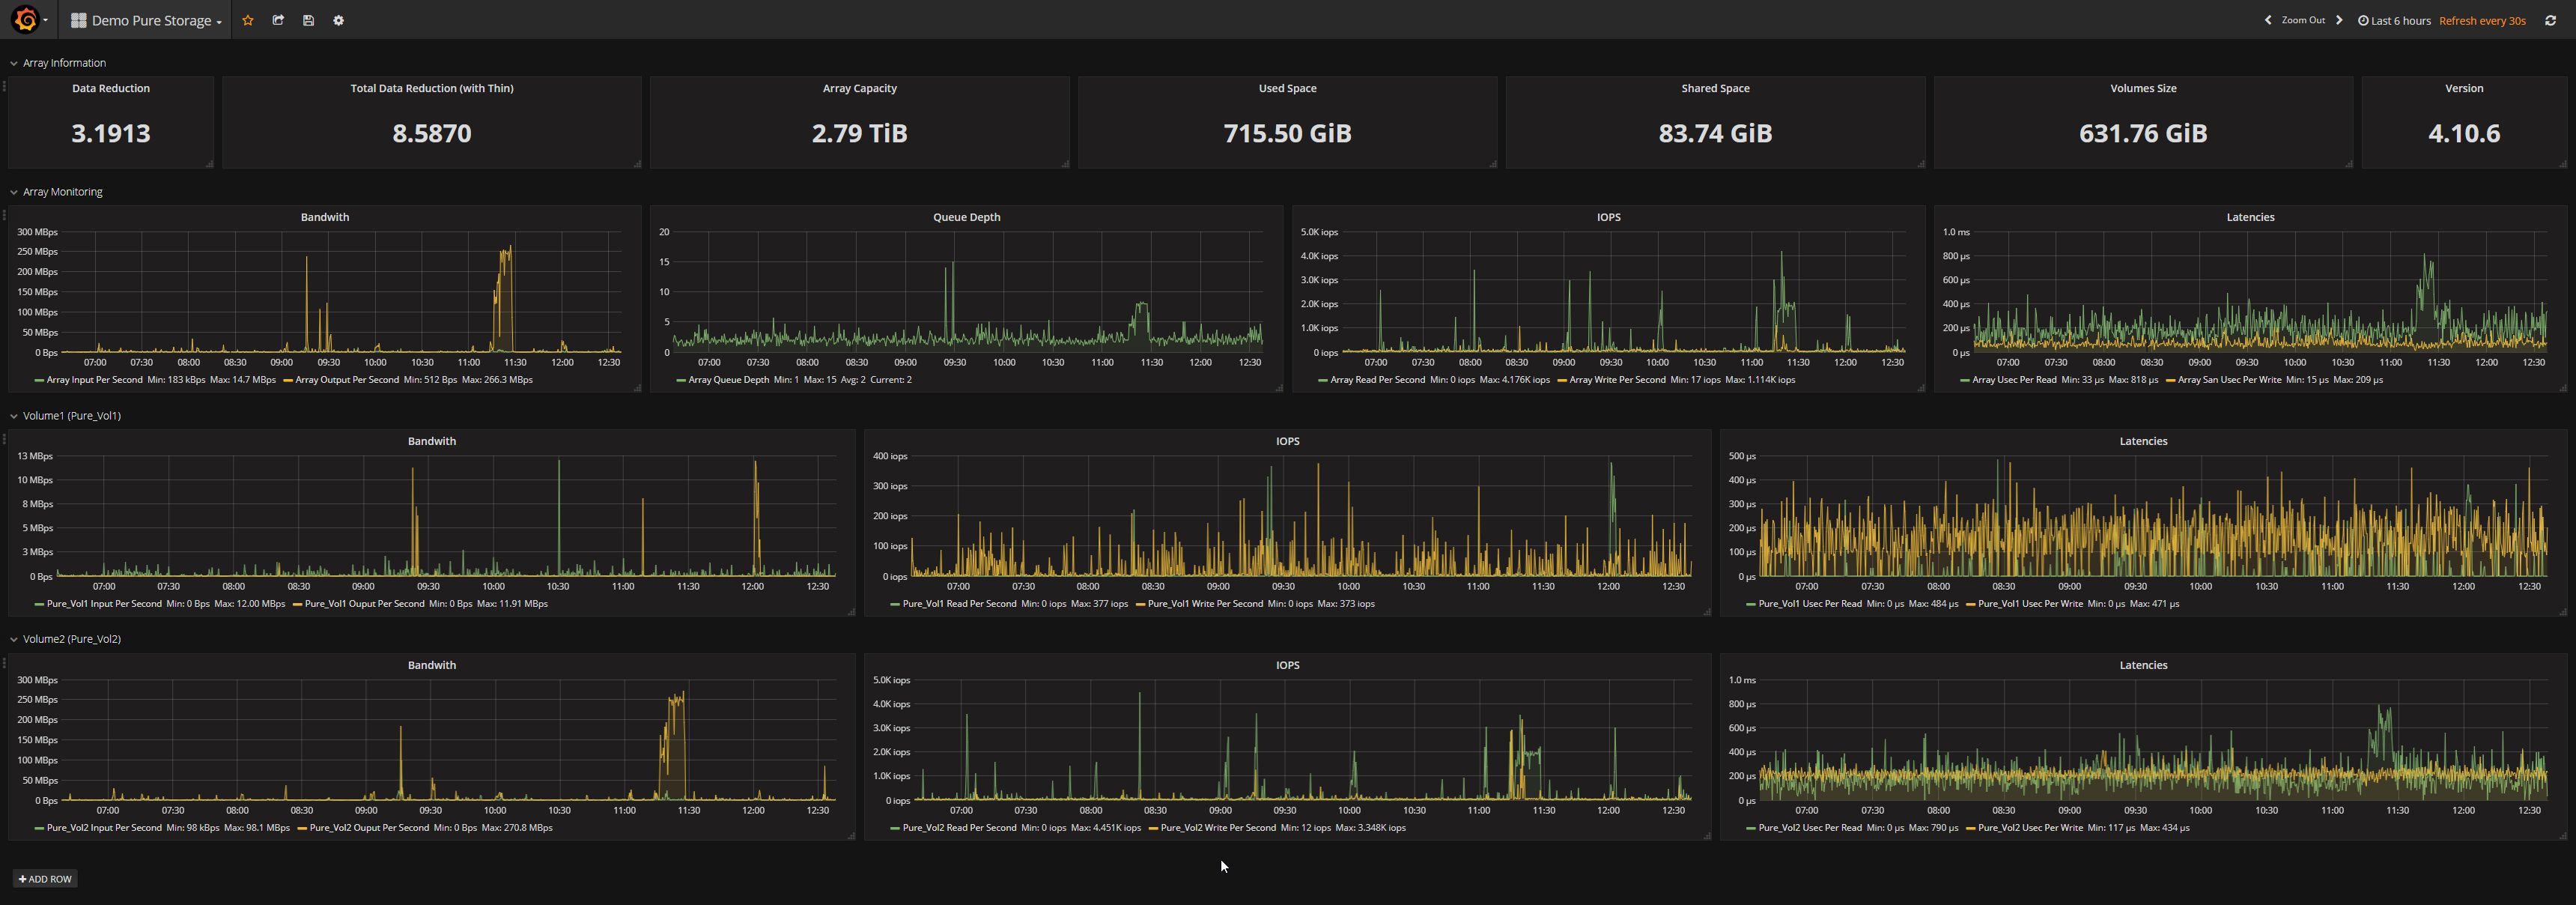
To be able to give information about this POC to everybody inside the team, we needed a dashboard. So with the help of Flash Array Rest API, Zabbix and Grafana, I produced this dashboard :
Please, bear in mind : These scripts and the Zabbix template are a "Work in progress". Currently we are on a POC and not yet in production so other elements will be added (triggers, items, etc.) and this post will be updated.
Zabbix integration
The Zabbix integration is made of :
- Python scripts and libraries
- FlashArray Rest API
- Zabbix Sender (with Trapper items)
- Zabbix ExternalScripts (executed on Zabbix Server or Proxy)
- Low-Level discovery
- Zabbix Macro
There are four scripts :
- LLD_PureVolume.py
- PureArrayInfo.py
- PureArrayMonitor.py
- PureVolumeMonitor.py
How it works
There are two parts in the Zabbix template :- Discovery rules
- Static items
Be ready
Important note : We are using Zabbix 3.4.x. So you could face some problems while importing the template. Let me know if it’s the case.Before we start with the integration into Zabbix, be sure to have the following tools installed on your Zabbix Proxy or Server :
- Python 3.x
-
purestorage and urllib3 libraries You can install them on your system by running the following command :
pip install purestorage urllib3
or (if your default Python version is not Python 3.x)pip3 install purestorage urllib3
-
Zabbix Sender You can install it with the following command :
apt install zabbix-sender
Get the necessary information
Before going further, you will need to gather the following information from your Pure Storage FlashArray :
- IP
- API Token
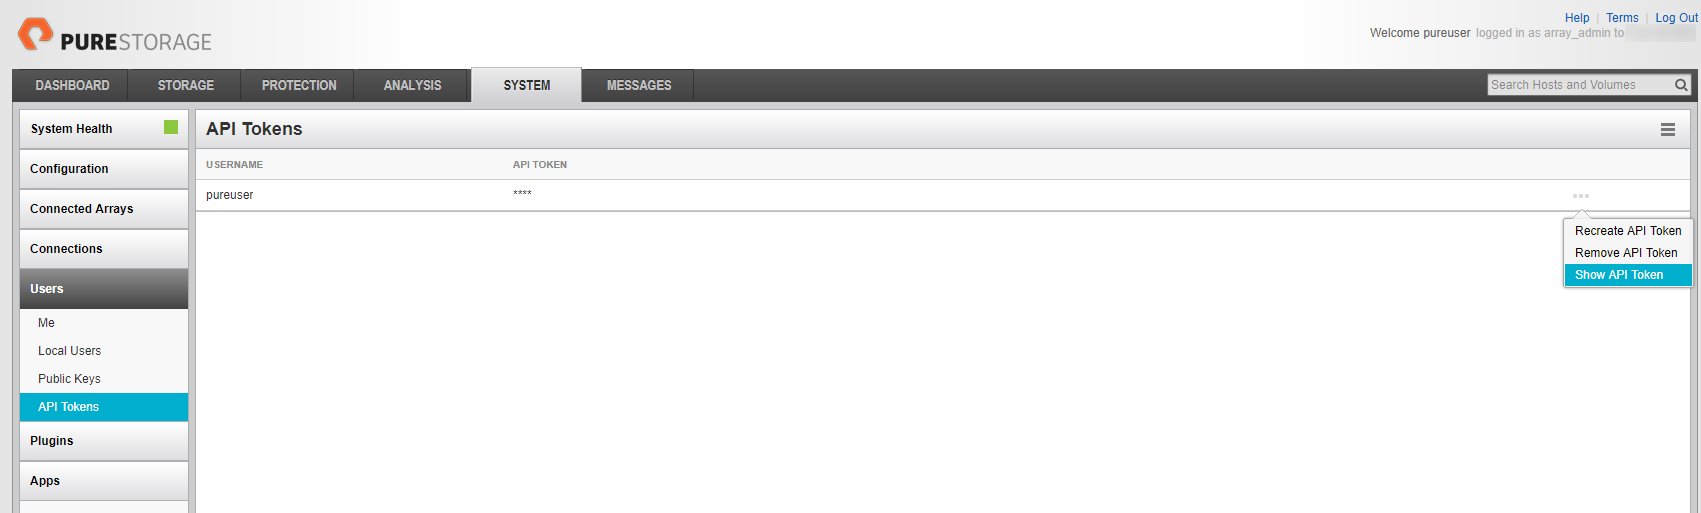
To get the API Token, open your Flash Array web interface and go on "API Tokens" menu under the "Users" menu that you will find in the "SYSTEM" tab.
You will see a list of users and three dots on the right of the screen. Click on it and finally select "Show API Token"
Let's start
If your system is ready and you have all the information at hand, let's start the integration on your system.
Download the scripts and the template
All the scripts and template are available on my GitHub repository. Download all those files and put the scripts on your ExternalScripts directory on your Zabbix Proxy or Server. By default this directory is : /usr/local/share/zabbix/externalscripts but check your Zabbix configuration file if you have any doubt. By example, we are using the official Zabbix packages for Debian and this directory is /usr/lib/zabbix/externalscripts
Set the good rights
To allow Zabbix to execute those scripts you must allow them to be executed and owned by the Zabbix user on your system. You can execute the following commands (under the ExternalScripts directory) :
chmod +x LLD_PureVolume.py PureArrayInfo.py PureArrayMonitor.py PureVolumeMonitor.py
chown zabbix:zabbix LLD_PureVolume.py PureArrayInfo.py PureArrayMonitor.py PureVolumeMonitor.py
Create a new Zabbix host
Once you have imported the template, you can create a new host and fill the following information :- Agent interfaces IP address : Fill in with the IP address of your Pure Storage FlashArray
- Macros
- {$PURE_TOKEN_API} : Fill in with the API Token that you have gathered from the FlashArray web interface
- {$PURE_ZBX} : Will be the IP of your Zabbix Proxy or Server that will be used by the Zabbix Sender. By default it’s set to “127.0.0.1”
- Monitored by proxy : Set this field if you put the scripts on a proxy.
It’s done
Once you have done all those steps, you have to wait until the data are gathered from the Pure Storage FlashArray.Items explanation
If you some question about the meaning of some items, you will find a description of each items in the description of each one. Example :