Agent failed to process method {ReFs.SetFileIntegrity} with Veeam and Synology DSM 7.0

Here is a small tip regarding an issue I had following the upgrade of a Synology NAS to DSM 7.0. I’m using this NAS as a SMB repository for the backup of my home lab and following the upgrade all my backup failed with the following error : “Agent failed to process method {ReFs.SetFileIntegrity}”

To solve this issue I’ve added the following registry key to my Veeam server then restarted the services :

  • Path : HKLM\SOFTWARE\Veeam\Veeam Backup and Replication
  • Type : DWORD (32-bit) Value
  • Name : UseCifsVirtualSynthetic
  • Value : 0

Veeam Backup & Replication 9.5 Update 1 with vSphere 6.5 support is available

A few weeks ago, I was writing about the availability of Veeam Backup & Replication 9.5 Update 1 RC and the way to get it. Today, you can get the official release from Veeam website. After the upgrade, your build version will be 9.5.0.823. Before making this upgrade, be sure that you are running build 9.5.0.580, 9.5.0.711 or 9.5.0.802.

What’s new

  • VMware vSphere 6.5 support
    • Encrypted VMs support
    • VMFS6 support
    • Virtual hardware version 13 support
    • NBD compression (you will have to change a registry key to manage it, see the release note for more information)
    • New guest interaction API support
    • New VM tag api support (see Using VMware tags and Veeam for easy backup configuration)
  • New platform support
    • Veeam Agent for Linux 1.0
    • Veeam Agent for Microsoft Windows 2.0 (public beta)
  • Backup copy
    • Performance improvements
    • Reliability improvements
  • And many others new features, improvements and bug fixes
  • You can also get Veeam One 9.5 Update 1 following this link


Using VMware tags and Veeam for easy backup configuration

When you have a certain amount of VMs, there is one step that you can easily forgot or that takes time : configure the backup job.

Each time you add a VM you have to open Veeam interface and add the VM to a specific job.

But, today, I have an easy way to add some automation to solve this problem : VMware tags and Veeam backup job based on tag.

Create tags in VMware vCenter

When you are in the web interface of the vCenter, you will find on the left sidebar a link named “Tags”

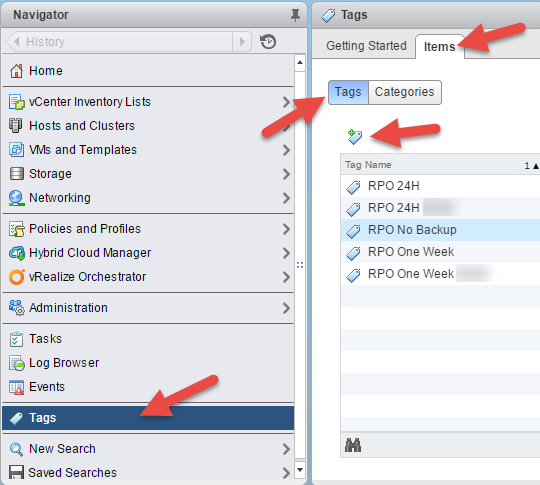
Click on this link, then “Items” and select the tab “Tags”. You will find all the existing tags on your vCenter. To create a new tag, simply click on the new tag button.

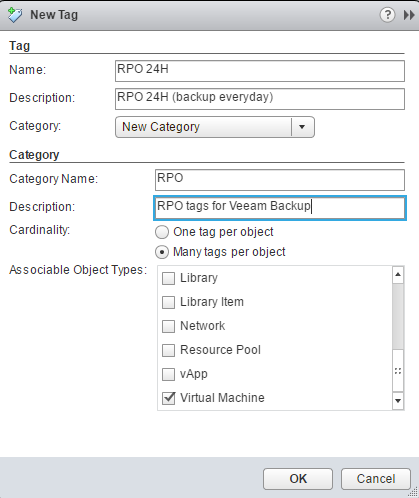
Repeat this step for each tag you want to use.

Adding tags to VMs

Once you have created all the necessary tags, it’s time to add them to your VMs.

Right click on your VM then select “Tags & Custom Attributes” and pick the option “Assign Tag…”image2016-8-17 13-57-50

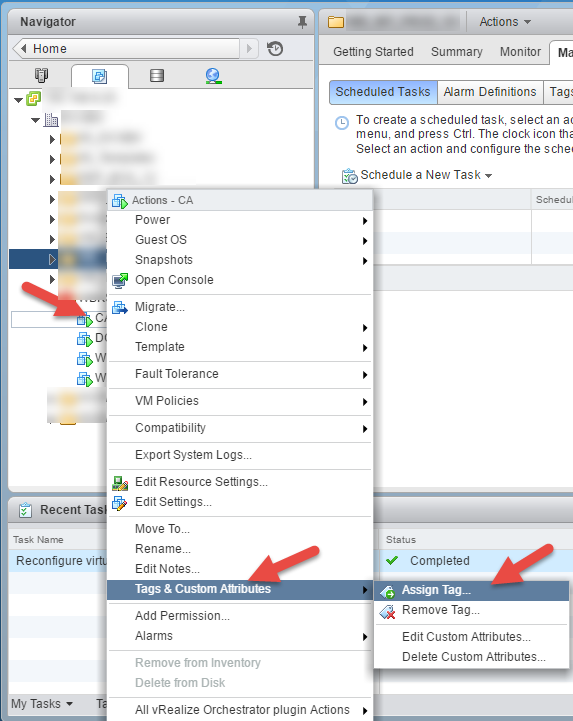
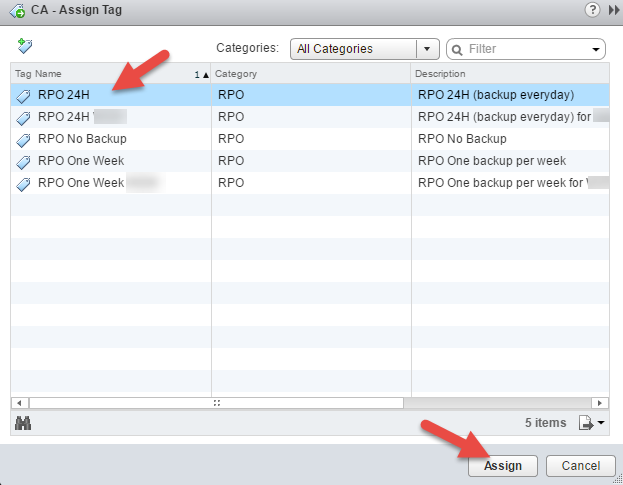
Select the tag that you want to add to this VM and click on “Assign”

image2016-8-17 13-59-10

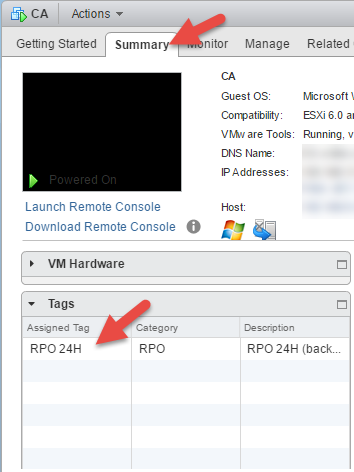
The tag that you have assigned will be visible on the “Summary” tab of the given VM.

image2016-8-17 14-0-39

Adding the backup job to Veeam

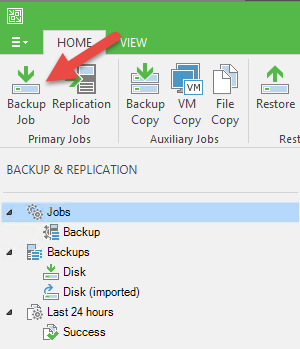
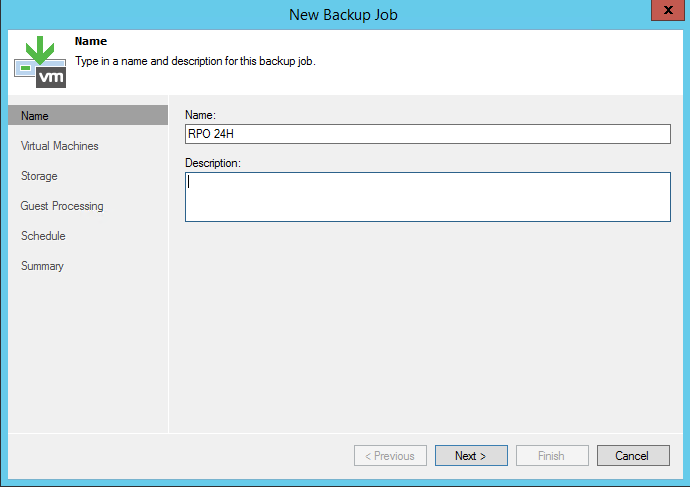
To use a tag in a Veeam backup job, you have to create a new job :

image2016-8-17 14-9-19

Then give it a name. By example the name of the tag :

image2016-8-17 14-13-56

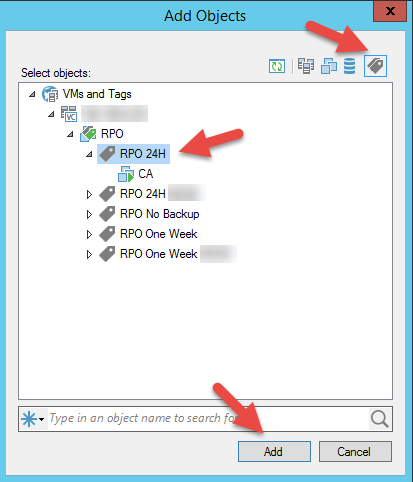
At the “Virtual Machines” step of the wizard, click on the tag button on the top right toolbar and select the tag on the list :

image2016-8-17 14-15-58

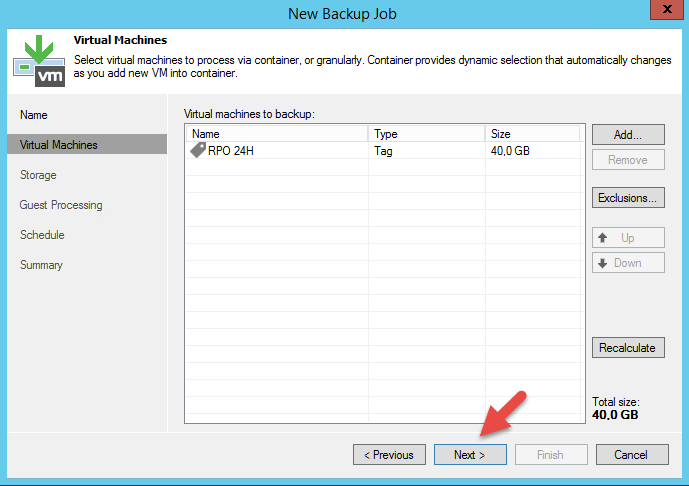
You will find the tag on the “Virtual Machines” list of the wizard :

image2016-8-17 14-17-43

Then configure all the next steps on the Veeam wizard and click “Finish”.

You will find the backup job on the jobs list :

image2016-8-17 14-18-47

At each job launch, Veeam will search for all VMs with the given tag. So you’ll never had to open the Veeam wizard again if you want to add a VM to a backup job.

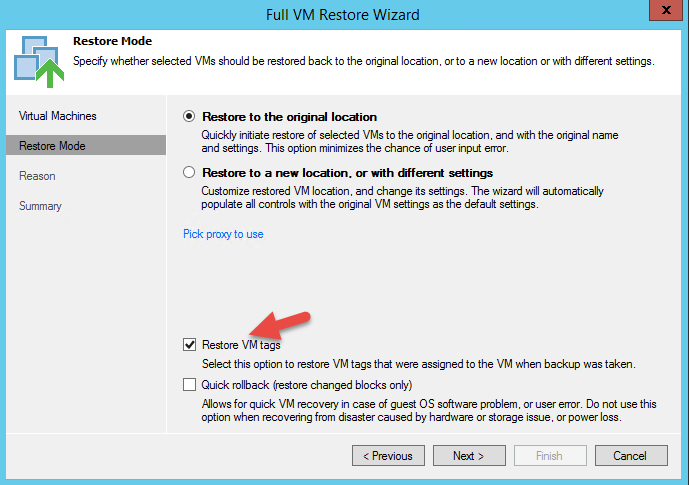
Full restore of a virtual machine

When you want to make a full restore of a VM with a tag, you have to select the “Restore VM tags” option on the “Full VM Restore Wizard”. If you don’t do this, the VM will  lose its tag :

image2016-8-17 14-35-12