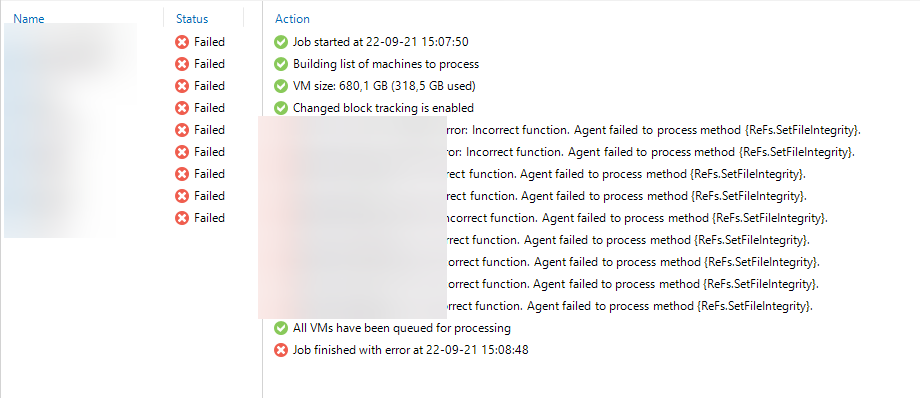
Here is a small tip regarding an issue I had following the upgrade of a Synology NAS to DSM 7.0. I’m using this NAS as a SMB repository for the backup of my home lab and following the upgrade all my backup failed with the following error : “Agent failed to process method {ReFs.SetFileIntegrity}”
To solve this issue I’ve added the following registry key to my Veeam server then restarted the services :
Path : HKLM\SOFTWARE\Veeam\Veeam Backup and Replication
If you are using OpenSSH Server on Windows Server 2019, the default shell is cmd.exe.
If you want to set the default shell to PowerShell or even PowerShell Core, you can run the following PowerShell command (it will create a registry key) then restart the OpenSSH server service :
If you want to use PowerShell Core, change the path of the value variable but note that currently a path with space in directory name seems to be unsupported.
If you are a regular SSH user, there are chances that you sometimes faced the error message “Connection reset by peer”. To avoid this message, you can edit some settings on server side or on client side. In this post I will show you both case.
Client side
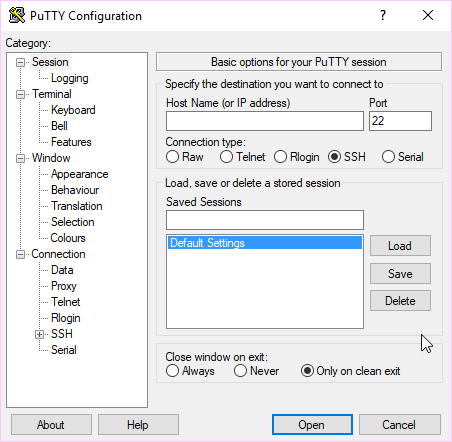
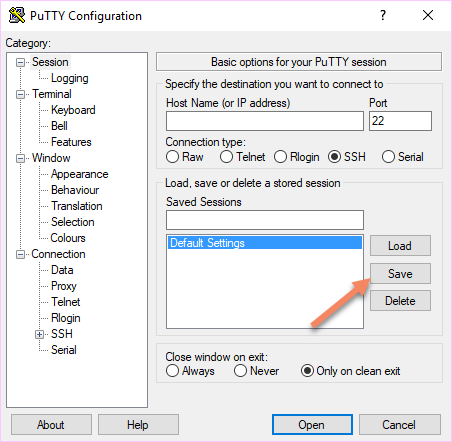
Putty
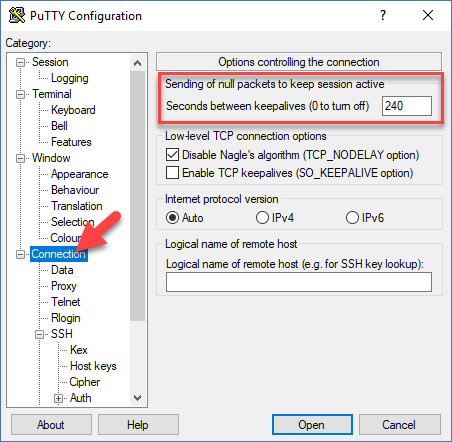
If you are using Putty, there is a setting under the “Connection” tab that allow you to set the keepalive value. By default it’s disabled (value is 0).
You can set the value at 240 and each 240 seconds, Putty will send a null packets to keep the connection open.
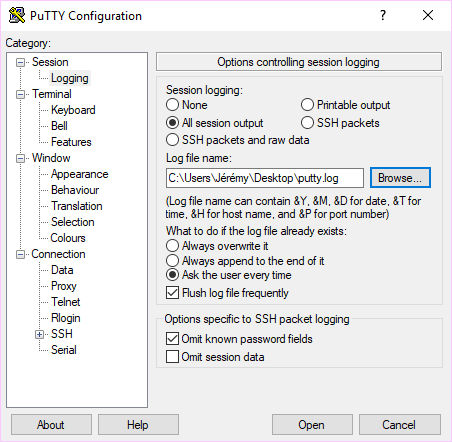
Be sure to set this value by default each time you launch Putty by following this post : Change Putty default settings
OpenSSH
If you are using OpenSSH (from a Linux machine or using WSL under Windows 10), you can change a settings for your user by editing the config file under the SSH directory in your home directory.
You can follow those steps :
Edit the config file
vi ~/.ssh/config
Add the settings to enable the keepalive
Host *
ServerAliveInterval 240
Set the following rights to the file
chmod 600 ~/.ssh/config
With this setting, your client will send a keepalive packet each 240 seconds to the remote host.
Server side
On the server side, you can edit the SSH server configuration file. If you are using Debian it will be “/etc/ssh/sshd_config”.
First, uncomment the following line :
#ClientAliveInterval 0
Then replace the value 0 by 240, save the file and restart the service.
At the end of 2017, I’ve shared a post talking about Zabbix and Pure Storage monitoring. At this time we were using it as a POC. A few weeks later, we were so happy with the product that we decided to use it in production.
So it was an opportunity to rewrite my monitoring script from scratch. It’s now time to share it with you. If you want more information about the purpose, the way I’ve made the integration, etc. don’t hesitate to read my previous post as the only modifications are the code and the type of information the script can gather from the array.
Instead of writing a script for each part of the monitoring (volumes, array, disks,…), I’ve put everything in one file called “PureStorageMonitoring.py”. The dependencies are still the same : purestorage and urllib3 libraries from Python and Python 3.x
A complete list of datas and triggers that will be gathered by the script is available at the end of this post.
Important note : This script has been tested with Zabbix 3.4.x and 4.0.x and Pure Storage 4.10.x and 5.1.x. I cannot guarantee that it will work fine with any other version even if I made my best regarding this point. The template available is exported from Zabbix 4.0.x so you will have to delete some settings to import it in Zabbix 3.4.x don’t hesitate to contact me in case of trouble.
Setup the proxy or server
To gather data, we need to make some works on the Zabbix Proxy or Zabbix Server.
Be sure that you have Python 3.x installed on the server
Install the pip packages
pip3 install purestorage urllib3 py-zabbix
Get API Token
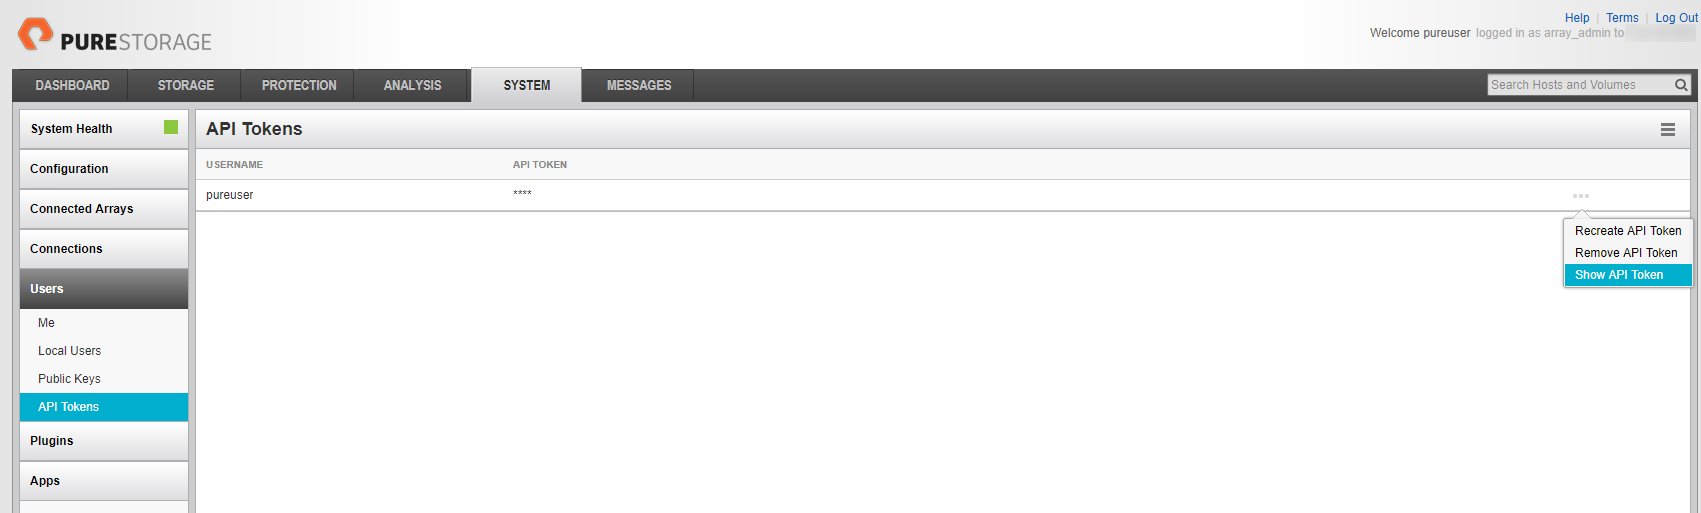
To be able to use the REST API of Pure Storage, you have to find your API Token on the web interface. Go on “SYSTEM”, then “Users” and under the Users menu, you will find “API Tokens”. Click on the three dots on the right of the screens and use “Show API Token” to get your API Token.
Download the scripts
The script is available on my Github repository. You can download it on the server using the following steps :
Find the directory where you have to download it, by looking at the value of “ExternalScripts” setting of your proxy or server (by default it’s “/usr/local/share/zabbix/externalscripts” but if like me you are using the official Debian packages from Zabbix, it will be “/usr/lib/zabbix/externalscritps”
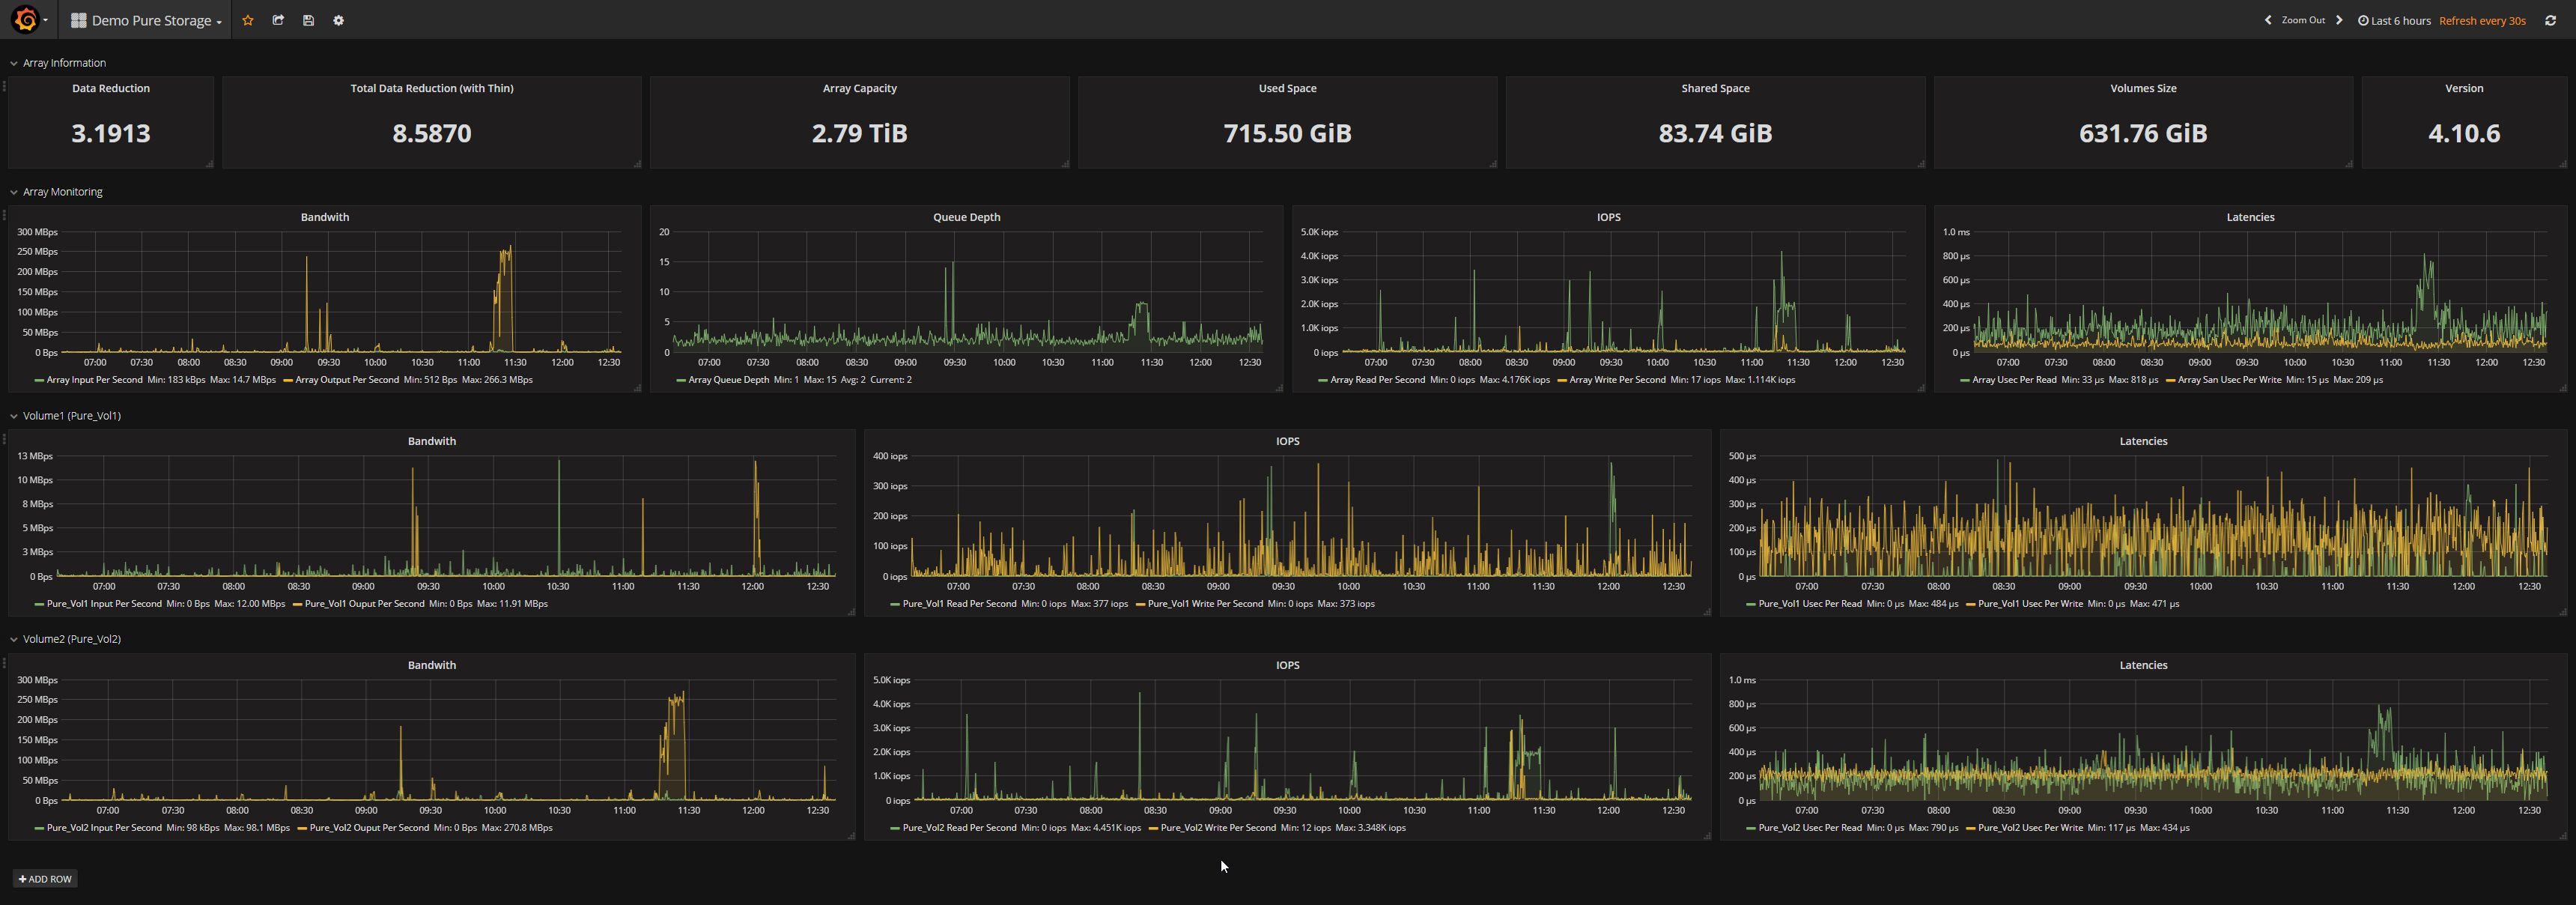
A few weeks ago, at work, we have started a new POC for one of our infrastructure with a Pure Storage FlashArray.
To be able to give information about this POC to everybody inside the team, we needed a dashboard. So with the help of Flash Array Rest API, Zabbix and Grafana, I produced this dashboard :
Please, bear in mind : These scripts and the Zabbix template are a "Work in progress". Currently we are on a POC and not yet in production so other elements will be added (triggers, items, etc.) and this post will be updated.
Zabbix integration
The Zabbix integration is made of :
Python scripts and libraries
FlashArray Rest API
Zabbix Sender (with Trapper items)
Zabbix ExternalScripts (executed on Zabbix Server or Proxy)
Low-Level discovery
Zabbix Macro
There are four scripts :
LLD_PureVolume.py
PureArrayInfo.py
PureArrayMonitor.py
PureVolumeMonitor.py
How it works
There are two parts in the Zabbix template :
Discovery rules
Static items
The LLD_PureVolume.py is responsible of the discovery rule. Zabbix will use it to get the list of existing volumes on the FlashArray and will create the corresponding items. The PureArrayInfo.py and PureArrayMonitor.py are responsible of gathering the data from the Array point of view. The PureVolumeMonitor.py is responsible of gathering data from the volume point of view using the items that will be created by the discovery rules. As all the data are in the same JSON output when we query the FlashArray API, the scripts will gather all information at the same time and will use the Zabbix Sender to populate all the Trapper items at each execution instead of launching the scripts for each items. The scripts will return “1” at the end and store it in an item called “Pure Array Info Launch”,”Pure Array Monitoring Launch” or “VolumeName Monitoring Launch”.
Be ready
Important note : We are using Zabbix 3.4.x. So you could face some problems while importing the template. Let me know if it’s the case.
Before we start with the integration into Zabbix, be sure to have the following tools installed on your Zabbix Proxy or Server :
Python 3.x
purestorage and urllib3 libraries You can install them on your system by running the following command :
pip install purestorage urllib3
or (if your default Python version is not Python 3.x)
pip3 install purestorage urllib3
Zabbix Sender You can install it with the following command :
apt install zabbix-sender
Get the necessary information
Before going further, you will need to gather the following information from your Pure Storage FlashArray :
IP
API Token
To get the API Token, open your Flash Array web interface and go on "API Tokens" menu under the "Users" menu that you will find in the "SYSTEM" tab.
You will see a list of users and three dots on the right of the screen. Click on it and finally select "Show API Token"
Let's start
If your system is ready and you have all the information at hand, let's start the integration on your system.
Download the scripts and the template
All the scripts and template are available on my GitHub repository. Download all those files and put the scripts on your ExternalScripts directory on your Zabbix Proxy or Server. By default this directory is : /usr/local/share/zabbix/externalscripts but check your Zabbix configuration file if you have any doubt. By example, we are using the official Zabbix packages for Debian and this directory is /usr/lib/zabbix/externalscripts
Set the good rights
To allow Zabbix to execute those scripts you must allow them to be executed and owned by the Zabbix user on your system. You can execute the following commands (under the ExternalScripts directory) :
I use cookies to ensure that I give you the best experience on this website. If you continue to use this site I will assume that you are happy with it.Ok