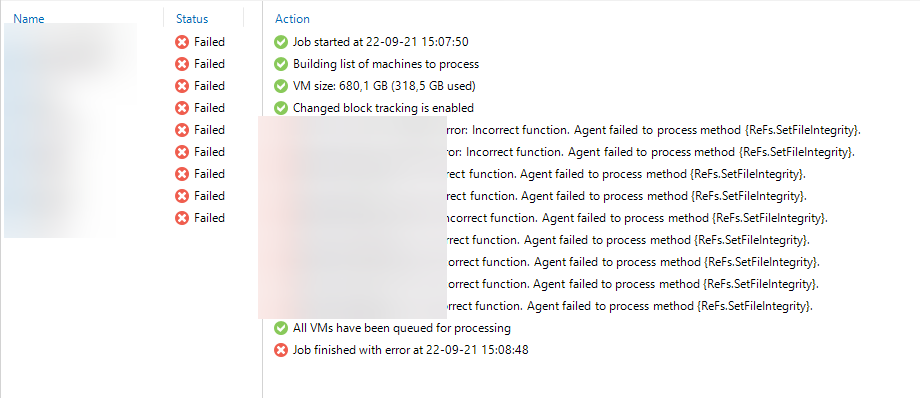
Here is a small tip regarding an issue I had following the upgrade of a Synology NAS to DSM 7.0. I’m using this NAS as a SMB repository for the backup of my home lab and following the upgrade all my backup failed with the following error : “Agent failed to process method {ReFs.SetFileIntegrity}”
To solve this issue I’ve added the following registry key to my Veeam server then restarted the services :
Path : HKLM\SOFTWARE\Veeam\Veeam Backup and Replication
If you are using OpenSSH Server on Windows Server 2019, the default shell is cmd.exe.
If you want to set the default shell to PowerShell or even PowerShell Core, you can run the following PowerShell command (it will create a registry key) then restart the OpenSSH server service :
If you want to use PowerShell Core, change the path of the value variable but note that currently a path with space in directory name seems to be unsupported.
If you are a regular SSH user, there are chances that you sometimes faced the error message “Connection reset by peer”. To avoid this message, you can edit some settings on server side or on client side. In this post I will show you both case.
Client side
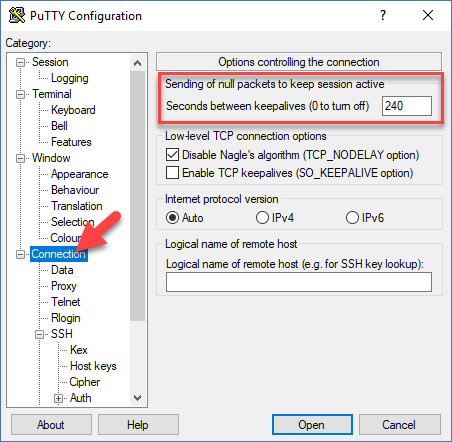
Putty
If you are using Putty, there is a setting under the “Connection” tab that allow you to set the keepalive value. By default it’s disabled (value is 0).
You can set the value at 240 and each 240 seconds, Putty will send a null packets to keep the connection open.
Be sure to set this value by default each time you launch Putty by following this post : Change Putty default settings
OpenSSH
If you are using OpenSSH (from a Linux machine or using WSL under Windows 10), you can change a settings for your user by editing the config file under the SSH directory in your home directory.
You can follow those steps :
Edit the config file
vi ~/.ssh/config
Add the settings to enable the keepalive
Host *
ServerAliveInterval 240
Set the following rights to the file
chmod 600 ~/.ssh/config
With this setting, your client will send a keepalive packet each 240 seconds to the remote host.
Server side
On the server side, you can edit the SSH server configuration file. If you are using Debian it will be “/etc/ssh/sshd_config”.
First, uncomment the following line :
#ClientAliveInterval 0
Then replace the value 0 by 240, save the file and restart the service.
If you are a Synology NAS user, maybe you want to read some logs to understand what’s happened when you face a problem.
There are two ways to do that :
Using Log Center package
Using Support Center
If you want to read logs about backup, user connection, etc. the first solution should be quite good but if you are looking for more specific logs about a system problem, slowness, etc. the second solution will give you more details.
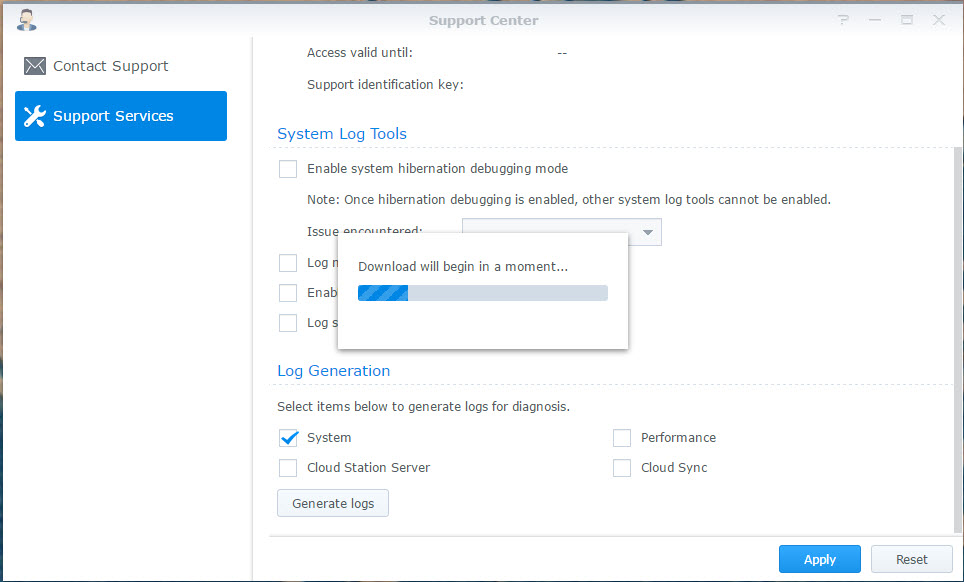
To export logs from Support Center, follow those steps :
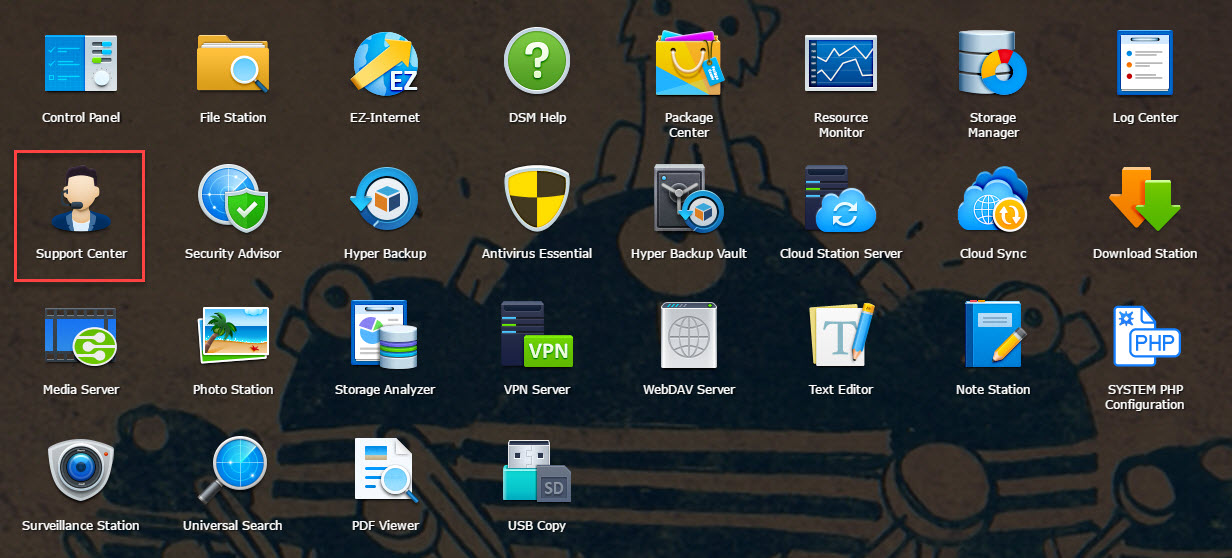
Open Support Center from Synology menu
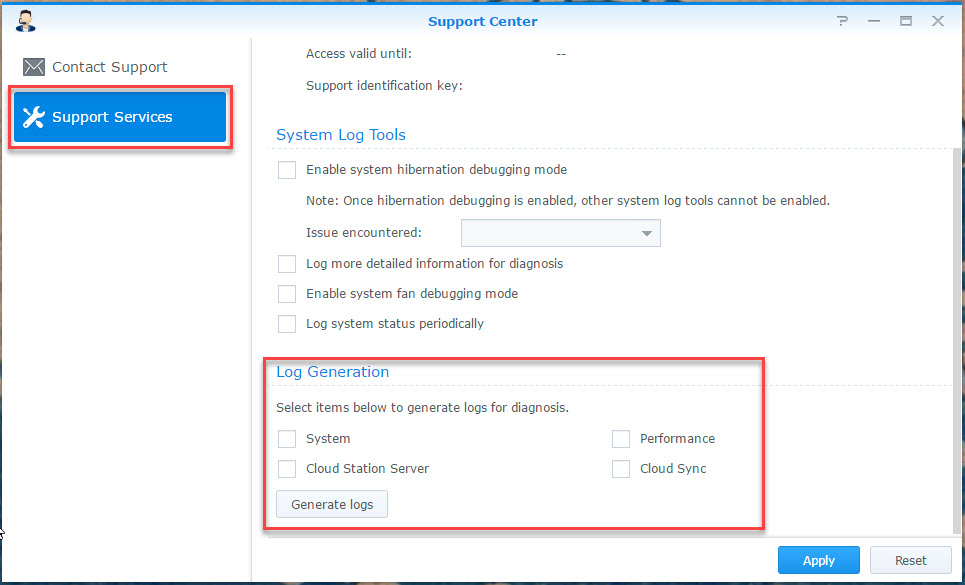
Go to “Support Services” tab and in the “Log Generation” menu, select the logs that you want to check, then click “Generate logs”
Wait a few minutes while your NAS is generating the logs
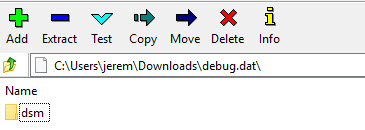
The file generated by the NAS will be named “debug.dat“, you can open it using 7-Zip.
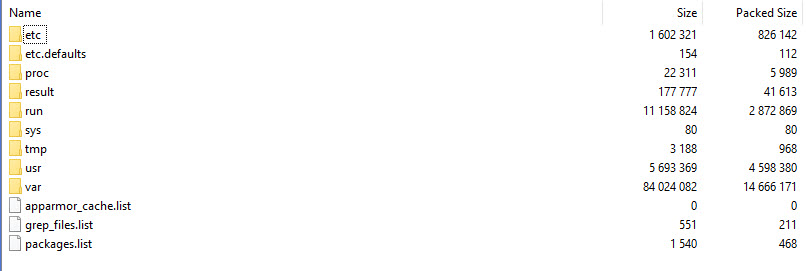
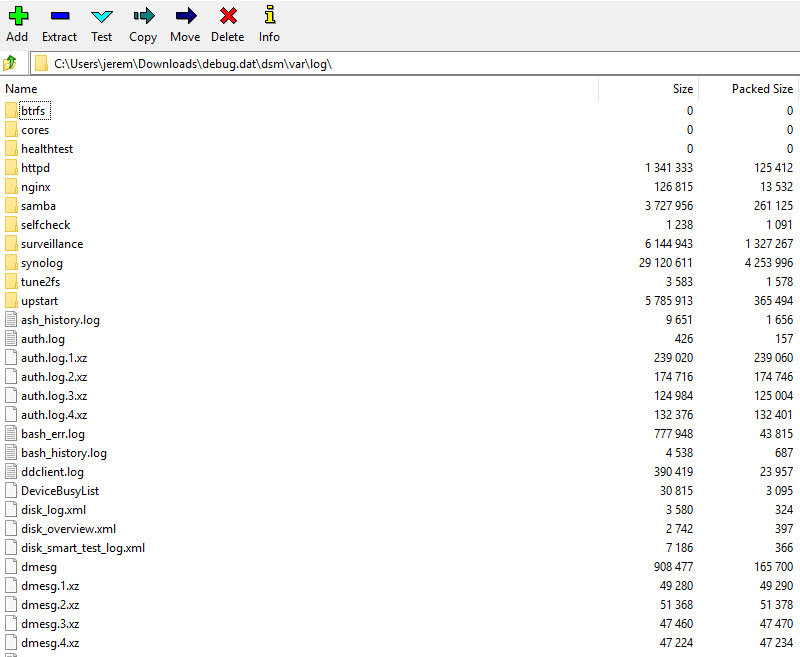
In the file you will find a directory named “dsm“, all the primary logs will be under the directory hierarchy : “dsm -> var -> log”
I use cookies to ensure that I give you the best experience on this website. If you continue to use this site I will assume that you are happy with it.Ok